Sunday, July 1, 2012
Wednesday, May 30, 2012
How To Make a Fringe T-Shirt
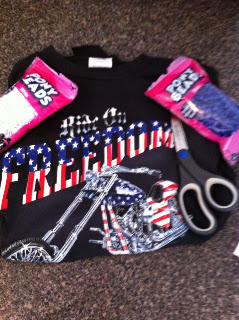
Hey guys! So the other day I was going to an America themed party. I wanted to have a cute look but still stick with the theme and I thought this was an easy way to do it. Make sure to check the bottom for some tips that might help along the way. Its super easy and anyone can do it. I went to Walmart and bought this shirt for just over $5, then bought two colors of beads. So, here is all you will need.

 Step one:
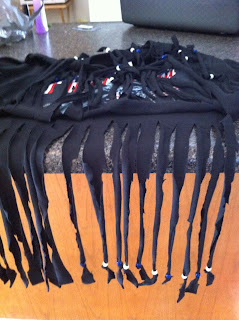
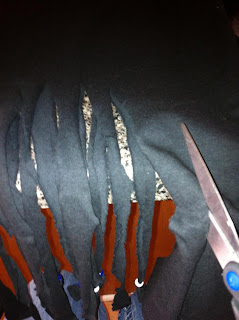 Cut your shirt so there are strips of fringe hanging down. Try and make them kind of even, don't worry about having the lines be completely straight. With the bead weighing them down the bad sides will fold in. Make sure to cut so that all of the strips start at the same point in a straight line, like the picture below.

Step two:
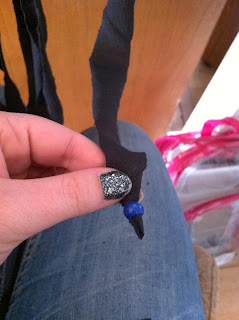
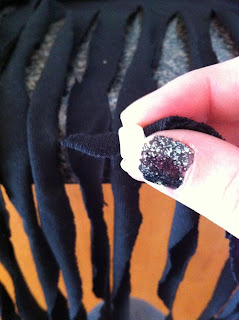 Step two is to put your bead on and pull it up, like the picture below.
 Tie a knot, and pull it tight. Slide the bead back down after.

Tip one:
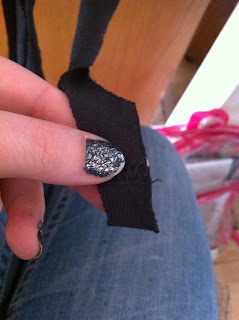 You may run into an issue with the bottom of your strand being too big. Roll it diagonally and slide the bead through that way.
Tip two:
 Make sure to do each side individually, that way you won't get the colors wrong when you alternate between bead colors.


Step two:


Tips!
Tip one:


Tip two:

The Finished Product

Thanks for reading and I hope this all worked for you. Happy crafting!
Wednesday, May 23, 2012
Key Hanger!
Hey guys, so this isn't a really extensive post. I just wanted to show you all the key hanger that I made the other day. I bought it unpainted at Walmart and just picked two colors of paint. Paint a few coats and make sure to get the insides of the letters and the outside edges! Once all of your coats have dried, take a pencil eraser, dip it in the polka dot colored paint and start to polka dot away! Once its dry you may have to go over some of your polka dots, I did. Here is the result. Thank for reading and happy crafting!


Tuesday, April 17, 2012
5 Steps to Remake Plastic Drawers
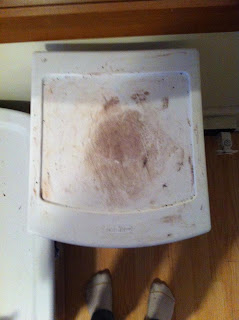
Hey everyone! So, the craft today is going to be about taking something you probably have and make it pop! I am using a set of plastic drawers that I keep makeup in along with other cosmetic things. I used to scribble all over the top of it with my eyeliner to soften it, and it ended up staining it. I thought about throwing it away, but then the crafty girl in me said there was a way to fix it and not be wasteful. SO, here it goes. Don't judge me by how foul the top of this table is.
Go from this. To this!


 The drawers or table, a fabric that you want to cover it, Mod Podge (please don't substitute with other adhesives), a brush to paint the Mod Podge with, and finally scissors.
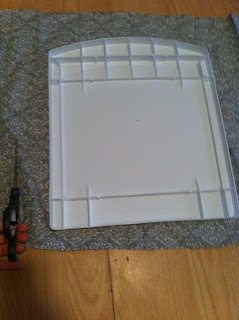 Take your fabric and cut it so that you have enough to cover the top (including creases!) and to wrap around the sides.
 Iron your fabric! Even if your fabric doesn't look like there are any wrinkles on it, iron to make sure. When you wrap the fabric you want it to look smooth and like it was manufactured that way.
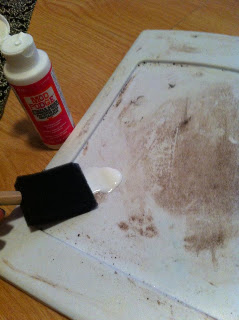 Take the Mod Podge and cover the whole lid with it. Make sure to put enough, it will dry clear! When its done it should look like this.

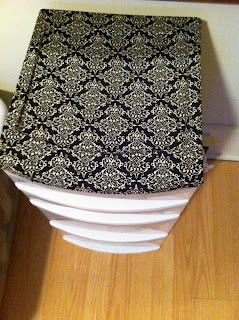
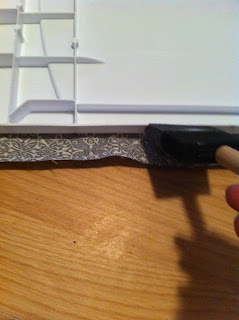
 Smooth the fabric on the top of the lid. Make sure to pay attention so that there are no wrinkles and pay special attention to the creases if you have any.

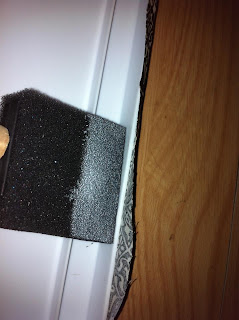 Put Mod Podge on the inside and out side of the sides. To get a clean look you'll definitely want to wrap the fabric to the other side. On the inside it should look like the picture below.


Go from this. To this!


What you'll need:

Step One:

Step Two:

Step Three:


Step Four:


Step Five:


The Finished Product!!


I hope this worked out for you! Thanks for reading, happy crafting!
Sunday, April 1, 2012
Encaustic- Badge Theme
Hi everyone! I know its been a while but I'm ready to get back into the swing of things! Okay, so this project is a little bit more art-focused. It isn't hard to do though, and its really fun. So, first here are the things you will need.
 First, you will need to get your wax. I suggest ordering it from this site, and order the damar medium. This wax will already be mixed for you and it will make things easier. You will need a flat heating surface, like this or even the hot surface you set a coffee pot on (although it will take longer). Next you will need brushes like the one displayed. You will need one brush for every color you decide to do, and a brush for your clear wax. You'll also need a sauce pan to heat the big chunk of wax, a ladle, and silicone or metal cupcake holders. First, you'll want to melt all of your wax in the big pan, this will be your clear wax. Next, you will ladle some wax into the cupcake holders. To make your colors add oil paint, use no more than the size of a pea. mix it in and your wax will be ready to use! Next you will want to get a heat gun or torch (you may also be able to use a hair dryer depending on how hot it gets). You'll also need a canvas or a surface to do your artwork on and an image printed from your computer on computer paper. Also, make sure to look at the bottom of the blog for SOME HELPFUL TIPS that you may need throughout the project.
 Take your surface you are doing your artwork on and paint a thin and even coat of clear wax on it.
Step Two:
 Take your torch/heat gun and fuse it. Basically you want to melt the wax so it attaches to the wood. When its done being fused, it should look like the photo below.

 Take the image you have chosen and dip the whole thing in the melted clear wax.

Next, put it on top of the surface you have already painted with clear wax, and paint over the image with clear wax. Again try and make it a thin, even, layer.
 Fuse it! When its finished, it should look like the photo below.

Step Six:
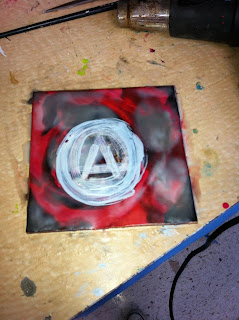
 Add a color! In my case, I chose red and painted over areas I wanted to show as especially red. When its done being painted it will look a little raw and like the image below.
 Then, you fuse it! WAIT until it dries completely before moving to the next step.
Step Seven:
 Add your next color. I added black to the parts where I wanted it to appear darker. When its done, again it will look a little raw, and like the photo below.
 Next, you fuse it and wait for it to dry before moving on.
 Add another color, in my case I decided to outline the badge in white, so when I fuse it, it will look a little ghostly and it may hold some of its shape. Next, you fuse it.
 At this point I felt that the wax was building up, which is okay. i just wanted the white spread out. I also chased some wax off the piece. It ended up looking like the picture below.

At this point you could stop and have a finished product. I wanted to continue with the collage, and if you do to follow to step nine!

Take your new picture and dip it in the wax completely. As you can see, I decided to enlarge my last image and just cut out the badge.
 Then you want to add it to your dry product, and paint over it with clear wax.
 Then you fuse. When its finished, it should look like the image below. This will be your final product!


If you want you can add a hanger to the back so that you can hang it on the wall.

Thank you all for reading again! I know this is a much more artsy thing than a crafty one, but it is easy and makes for a really nice decoration at the end of the day! I hope it worked well for you, happy crafting!

Step one:

Step Two:


Step Three:

Step Four:

Next, put it on top of the surface you have already painted with clear wax, and paint over the image with clear wax. Again try and make it a thin, even, layer.
Step Five:


Step Six:


Step Seven:


Step Eight:


At this point you could stop and have a finished product. I wanted to continue with the collage, and if you do to follow to step nine!
Step Nine:

Take your new picture and dip it in the wax completely. As you can see, I decided to enlarge my last image and just cut out the badge.


SOME HELPFUL TIPS:
When you decide that you want to add more of a certain color, you will return to your brush and find that it is hard. All you need to do is press it against your hot surface and slowing it will all melt and be like it was before!
If you want you can add a hanger to the back so that you can hang it on the wall.

Thank you all for reading again! I know this is a much more artsy thing than a crafty one, but it is easy and makes for a really nice decoration at the end of the day! I hope it worked well for you, happy crafting!
Subscribe to:
Posts (Atom)